
Stop letting warping and misalignment ruin your hard work by mastering the proven thermal control techniques that prevent common welding defects.
Mastering the control of metal movement is a fundamental skill for every professional. Failing to manage thermal dynamics often leads to common welding defects that compromise structural integrity. This guide explores the mechanical principles behind weld distortion and the techniques to ensure your projects remain precise and aligned.
The Physics of Metal Movement
At its core, welding is the precise application of heat to fuse materials. However, that same heat is the primary driver of distortion. When metal is heated during the welding process, it expands. As the joint cools and solidifies, the material attempts to contract. If the surrounding base metal is cold and rigid, it prevents the weld area from shrinking uniformly. This internal struggle between expansion and contraction forces the material to buckle, bow, or twist.
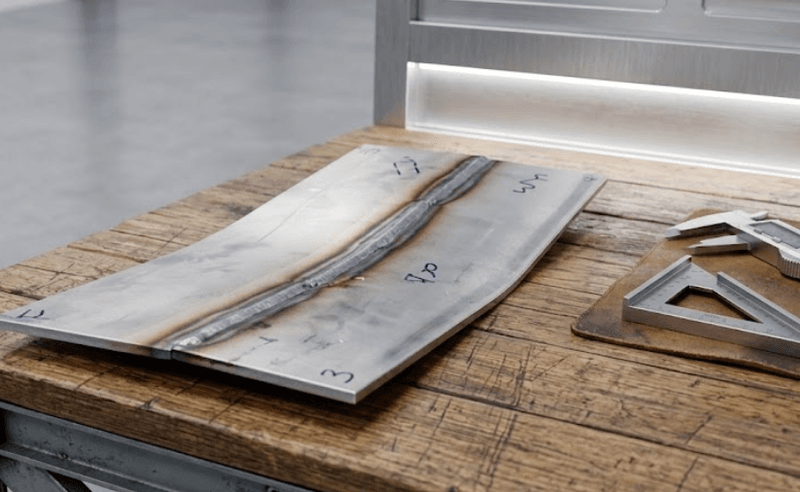
Understanding that distortion is a predictable physical reaction rather than an accidental occurrence is the first step toward mastering the trade. Different metals possess unique coefficients of thermal expansion. This means the way mild steel reacts to your torch will differ significantly from the way aluminum or stainless steel behaves. Recognizing these material properties is essential for minimizing welding defects during the assembly phase.
Common Manifestations of Welding Defects
Distortion rarely presents in just one way. Recognizing the specific pattern of movement helps you diagnose issues early in the build.
- Longitudinal Shrinkage. This occurs along the length of the weld as the bead cools, often causing the entire piece to shorten.
- Transverse Shrinkage. This movement happens perpendicular to the weld, often pulling the edges of the plates together or causing them to overlap.
- Angular Distortion. This is perhaps the most visible issue, where the heat causes the edges of the joint to rotate or curl, creating a V-shape instead of a flat surface.
- Buckling. Typically seen in thin sheet metal, this manifests as waves or ripples across the surface where the metal has been pushed beyond its limits.
Proactive Strategies for Precision
Preventing weld distortion begins before you even strike an arc. The way you prepare your materials and set up your workspace dictates how well your final product will hold its shape.
Strategic Joint Design
The type of weld joint you select is critical. A single-V groove requires more weld metal and heat to fill than a double-V or a well-fitted square groove. By minimizing the volume of filler metal needed, you reduce the total heat input required to close the joint. This directly limits the forces that cause welding defects.
The Role of Fixturing
Rigid clamping and jigging are the most effective ways to resist the natural movement of metal. By securing the workpiece to a heavy table or using clamps to hold parts in a fixed position, you force the metal to cool in the desired shape. Note that while fixtures resist movement, internal stresses may remain, so it is necessary to combine clamping with smart welding sequences.
Tactical Welding Techniques
Once you begin welding, your technique becomes the primary control mechanism. Consistency and heat management are the difference between a straight assembly and one that requires extensive post-weld correction.
Controlling Heat Input
One of the most frequent causes of excessive warping is oversaturating the joint with heat. Using the correct amperage and maintaining a steady travel speed prevents heat from building up in one localized area. If the heat is allowed to soak into the surrounding base metal, the area of expansion increases, and so does the likelihood of severe weld distortion.

Distribution Sequences
Rather than running a continuous long bead that forces all thermal energy into one spot, consider these methods to distribute stress:
- Backstep Welding: Instead of welding in the direction of the progression, you weld short segments in the opposite direction. This helps distribute the thermal contraction forces more evenly.
- Skip Welding: This technique involves welding a short segment, then moving to a different, non-adjacent section of the joint to weld again. This allows the first section to begin cooling before more heat is added to the immediate area.
- Balanced Welding: When working on symmetric joints, alternate sides of the weld to keep the thermal pull balanced, which prevents the piece from pulling toward one side more than the other.
The Importance of Foundational Training
Mastering these techniques requires more than just reading theory; it requires time under the hood. Understanding how to mitigate welding defects is a skill built through repetitive, guided practice. Professionals in the field must first establish a rock-solid foundation in manual welding processes before they can effectively manage complex material behaviors or move into specialized high-stakes industries.
At Arclabs, we believe the path to becoming a highly skilled welder starts with mastering these core, fundamental techniques in a professional shop environment. Our instructors focus on helping students gain the hands-on experience necessary to develop the muscle memory and "feel" for the metal that cannot be taught in a classroom alone.
If you are ready to build a strong foundation and gain the practical skills required to excel in this trade, we are here to support your journey. Contact Arclabs Welding School to learn about our welding programs, class schedules, and how we can help you develop the skills that industries are actively seeking. Visit us at arclabs.edu for all locations or call 877-647-4111 to speak with an admissions advisor about your welding education options.

